 I love the look of the fabric flower bouquet with brooches! It has a classic elegant look and I won't have to worry about them staying fresh looking or making sure I dry them properly. So, I figure others will love this look as well! Problem is, some of these bouquets can cost upward of $1,000. Naturally, I took to doing what I do best and made it myself, here is how:
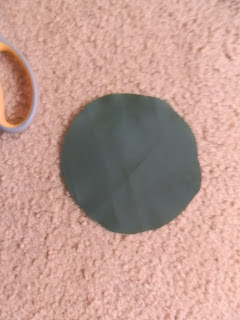
I started by making a circle pattern. This way all my flower petals will be about the same size. I used the end of a paper tablet, you know the cardboard at the back of a pad. I remembered the flowers would be shrinking some due to the burning process and made my circle a few centimeter's larger than I want I bought some satin fabric at the store about 4 yards, I wanted to make not only flowers for a bouquet, but for all the bouquets, plus my table settings would have them instead of real flowers to cut down on costs. Make sure the fabric is polyester or the petals won't burn properly. I made sure to get different colors to bring in my multiple color scheme.
 I started by placing my pattern on the fabric and using chalk traced it over and over again until the entire fabric was covered in circles.
 Next, I cut out the circles.
Now, I had to decide how many petals I wanted the flowers to have. You can have thick petals or thin ones depending on how you cut your slits. You can alternate petal size if you so desire, the look is up to you!
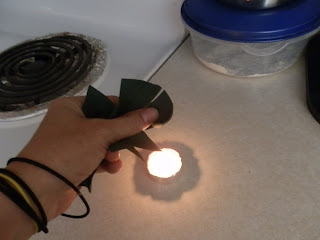
Be careful with this next step, I burnt myself a lot. Remember that the fabric will catch on fire so do a test run first with how close to hold the fabric to the flame for the effect you are wanting. The fabric may curl and it's up to you how much you want them to curl. Carefully, using a tea candle, burn the edges of your petals.
Not much to look at right now, but you can see how the size has shrunken down and the fabric has some curl to it.
 I did some different sizes so you could get an idea of how the thickness of your petals can change the look. I'll use these different shapes in one flower for this example.
 Now, lay each layer of petals on top of each other, at least 5 should be used, more for a fuller flower. Remember, the more you use the harder it can be to sew into shape and to get the stem on later. Stitch the center of the flower petals together. I went in a circle around the center to make it easier on myself.
Now, if you used a circle like me, slowly pull the thread to bunch up the center creating what we will call a bud on the bottom. If you didn't use a circle, then tie off the center stitching. Now, fold the circle in half, then in half again and stitch the bottom so it stays.
This creates the flower. You can skip down to putting on a stem from here as the next steps aren't required, but just something I did to mine out of preference.

I wanted my flowers to keep their shape and decided to add some starch to them, but I don't like the smell of starch sprays. So, simple fixes came about.
 Grab some starch spray and start spraying! Really saturate them, but remember if you plan on having candles or anything this will increase your already flame-able flowers desire to light up! Let the flowers dry.
Here are my flowers nice and stiff!
To get ride of that spray I used linen spray. I chose a rose scent and made sure to spray the flowers while they were still wet from the starch spray to help keep the scent going. Another spray once dried and a third right before the wedding and my bouquet smelled just like flowers!
 Next, I took floral wire and added the stem. You can add a brooch at this point or leave the brooch off. To add the brooch decide how long you want your stem to be and double that length when you measure out your wire. Bend the wire in half. Thread the brooch through the wire onto the end of the wire fold.
Now, push each of the wire ends into the center of your flower and thread the flower up the wire so the brooch is in the center of your flower.
You can wrap floral tape around each flower separately and arrange your table settings or bouquets after the flowers are all put together or put them together and wrap the floral tape around them.
Enjoy your beautiful flowers!
You can check out the bouquet I made from my flowers HERE!


No comments:
Post a Comment